Let's Begin!!
You've chosen your new DSLR camera! Yay!! Welcome to your new passion! Even though the cameras on mobile phones are great there is so much more you can do with your camera.
The best thing about photography is that it's about 10% knowledge and 90% practise so the best thing to do is take your camera out and practise! Find the control dial and set it to M - for Manual. This is the best way to learn to use your settings as the camera doesn't do any of the work for you.

The next thing to do is to go to your manual so you can figure out which dials or buttons change the settings you need. For now set your ISO to 100 and your Aperture to 5.6. Don't worry about them for now, we will deal with them in later tutorials and talk about how they all work together. If you try and understand them all at once you'll just get confused!
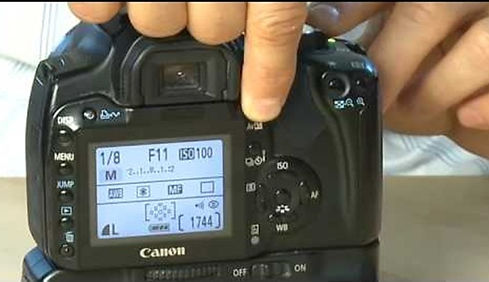
In the picture below you will see what your screen looks like when you switch the camera on. The first number 1/8 is your shutter speed. This is one eight of a second, which is quite slow.
The next no is F11, the F stops are your aperture, which we will discuss later, for now set it to 5.6.
The next no is ISO 100, this is the lowest setting and is basically how sensitive your camera is to the light but again, we will look at this later, for now set it to 100 so it doesn't interfere with how you see the light changing with your shutter speed.
Watch the tutorial below but don't worry about what he says about aperture and ISO for now
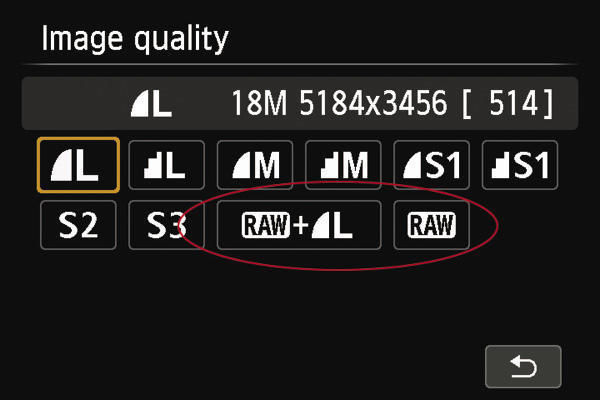
In your menu find the image quality setting. You can set it to large or medium, you're not too bothered about quality at this stage as these are just going to be practise shots so you'll probably be deleting most of them. In future you'll be using just RAW but we'll go into that when we move on to editing.
Now take your camera out and take photos, changing the shutter speed and look at the results on your screen. If you like when you get home you can download them onto your computer so you can look at them on a bigger screen.
Take particular notice of moving objects, how the slower shutter speed blurs things and faster shutter speeds brings things into sharper focus.... Children, cars, water, etc. You will also notice that faster shutter speeds bring less light in, they may be way too dark and slower shutter speeds let in more light, they may be far too bright! Don't worry about that for now, you use aperture and ISO to fix that later on. For now you just need to understand the effect that shutter speed has on image quality and lighting.
Have fun!

A faster shutter speed freezes the motion
As you can see in the bottom image, although the shutter speed was fast enough to appear to have frozen the motion, there is still a little bit of blur when you zoom in on the hand.

